Deploy deep learning models in browser using Tensorflow.js
API is traditionally the default choice of deploying ML models. Backend API and front end UI can be built separately by different experts to accelerate the product development. However when deploying deep learning models, the inputs are usually unstructured data, such as texts, audios, images or even videos. Uploading sizeable files to API endpoints will significantly reduce the speed of model response and hence affect the user experience.
Tensorflow.js is an amazing tool that allow deep learning models to be deployed in browser, so that users don’t have to upload their data to server for prediction. Instead the browser downloads a copy of the model from server and make the predictions on user’s end. This approach has a significant advantage on speed of response, so that some real time predictions (e.g. face detection from webcam) are made possible.
This post focuses on the deployment of trained keras model in browser using Tensorflow.js. If you are interested to know about how the BMI prediction model was trained, you can move to my previous post - Detect faces and predict BMI, Age and Gender using Keras
1. Convert Keras model to TF.js model
Due to the size constraint of browser, we trained the model in MobileNet[1] instead of VGG16/ResNet50 in previous post. MobileNet replaces full convolution layers with depth-wise separable layers and point-wise layers to reduce the numbers of parameters in the model. The resulting MobileNet is only 9 MB in size comparing with VGG16 model with size 528 MB[3].
Conversion can be done using either bash command or in python, and they are described in TF.js official site[2]. I prefer using conversion in python, because I can do the conversion along with the model training with Keras.
# load your existing keras model
from tensorflow import keras
model = keras.models.load_model('path/of/your/existing/keras/model')
# convert to TF.js format
import tensorflowjs as tfjs
tfjs.converters.save_keras_model(model, tfjs_target_dir)
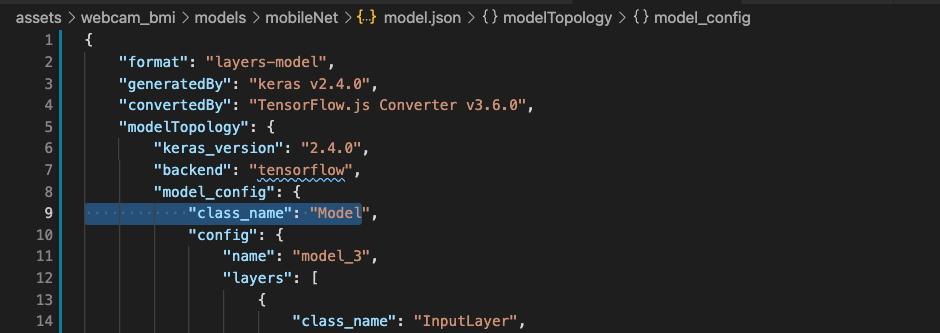
Converted model should have one model.json and one or more group-shard.bin files in the target directory. If your keras model is Functional, you probably need to modify the className from Functional to Model in the model.json, otherwise you will get an error when model is being loaded. Not sure if it will be fixed in future release for tensorflow.js.
2. Load TF.js model
The very first step of loading TF.js model is to include the TF.js module in HTML (index.html), by including the following script tag.
<!-- Include TF.js in HTML -->
<script src="https://cdn.jsdelivr.net/npm/@tensorflow/tfjs@2.0.0/dist/tf.min.js"></script>
<!-- Include index.js, which defines our own functions -->
<script src="index.js"></script>
In the index.js file, add the following lines to load the model.
const MODEL_PATH = '/assets/webcam_bmi/models/mobileNet/model.json';
function loadModel(){
    const model = tf.loadLayersModel(MODEL_PATH);
    console.log("model is loaded");
    return model;
}
const model = loadModel();
The model needs to be hosted to be successfully fetched in the browser. There are multiple ways to achieve that.
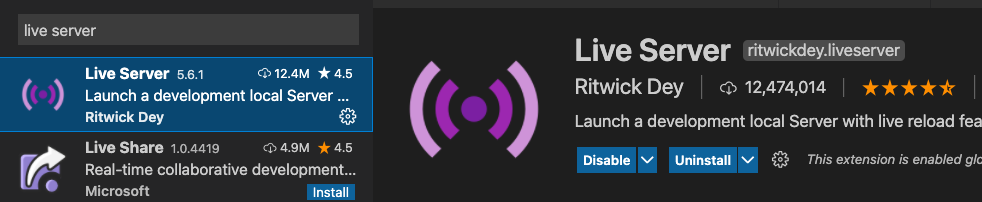
- The easiest method is using
Live Serverextension inVisual Studio Code. ClickGo Livebutton on status banner after extension installed and then your local model files can be fetched.
- Alternatively, a separate backend service can be used to host the model files. e.g. in FastAPI, the model files can be mounted using
StaticFiles.
from fastapi import FastAPI
from fastapi.staticfiles import StaticFiles
app = FastAPI()
# mount your local model files to /models directory
app.mount("/models", StaticFiles(directory="/your/local/models"), name="models")
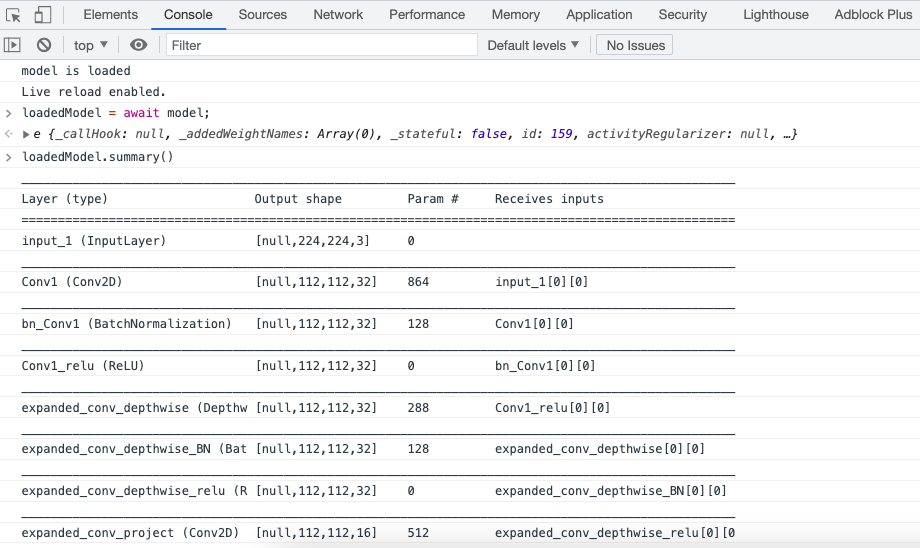
Once our localhost is live, we can examine the model architect in browser console at http://localhost:5500/index.html. If we are able to view the model summary, it means that the model is correctly loaded.
3. Load HTML Element as Tensor
We now have the model loaded, but how about the input tensors from user? In TF.js a function called tf.browser.fromPixels can be used to load the content of HTML element (e.g. the <img> in our example) as tf.Tensor.
In index.html, add an image test.png for testing.
<!-- Include a test image -->
<img src="test.png" alt="" id="image">
In index.js, add following lines to define loadImage function.
// load image
const IMAGE_SIZE = 224; // input size of mobileNet
const image = document.getElementById("image");  // assign the image element
function loadImage(elm) {
    // elm is the HTMLElement (image / webcam)
    const x = tf.tidy(() => {
        // read tf.Tensor from elm and convert to float
        let img = tf.cast(tf.browser.fromPixels(elm), 'float32');
        // insert dimension [w, h, 3] -> [1, w, h, 3]
        img = img.expandDims(0);
        // resize to [1, 224, 224, 3]
        img = tf.image.resizeBilinear(img, [IMAGE_SIZE, IMAGE_SIZE]);
        const offset = tf.scalar(127.5);
        // normalize to range [-1,1] for mobilenet input
        const normalized = img.sub(offset).div(offset);
        return normalized;
    });
    return x;
}
In the console, we can call loadImage(image) to capture the Tensor of the image shown.

4. Predict from Uploaded Image
We now have model and input X, and then the prediction should be obtained straight forward from y = model(X). In fact, it is indeed simple in TF.js.
const loadedModel = await model; // return the actual model from promise
model.predict(X).print() // make prediction and print out
However, the model in our example is only a Promise, so we need to usethen method to construct our prediction step.
In index.html, we need to create some HTML elements for image upload, display and prediction:
<img>tag: for displaying the uploaded image<input>tag: to upload file- 2x
<button>tags: (1) for upload action (2) for prediction action
<!-- input image -->
<div>
    <img src="" alt="" id="image">
    <button id="uploadButton">Upload Image</button>
    <button id="predictButton">Predict</button>
    <input type="file" id="myfile" name="myfile" style="display:none;">
</div>
In index.js, we define predictImage, upload, previewImage functions accordingly for the buttons.
// assign elements
const predictButton = document.getElementById('predictButton');
const uploadButton = document.getElementById('uploadButton');
const files = document.getElementById("myfile");
// add events to buttons
predictButton.addEventListener('click', predictImage);
uploadButton.addEventListener('click', upload);
files.addEventListener('change', previewImage);

function upload() {
    files.click();
}
function previewImage() {
    // display the uploaded image
    image.src = URL.createObjectURL(files.files[0]);
}
function predictImage() {
    const x = loadImage(image); // load input tensor from image
    model.then((loadedModel) => {
            loadedModel.predict(x)})  // make prediction
         .then((predictions) => {
            let [a, b, c] = predictions; // unpack bmi, age, sex tensors
            // use dataSync to extract value from tensors
            [bmi, age, sex] = [a.dataSync()[0], b.dataSync()[0], c.dataSync()[0]];
            // print out in console
            console.log(`BMI: ${bmi.toFixed(2)} AGE: ${age.toFixed(2)} SEX: ${sex.toFixed(2)}`)
        })
}
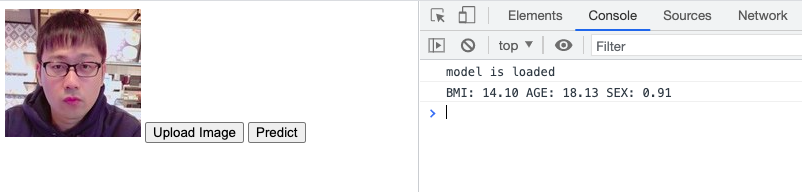
After modifying index.html and index.js, refresh the page and test it out. I just tested with a picture of younger me. The prediction is apparently quite off though.
5. Predict from Webcam
Predicting from webcam shares the same building blocks of predicting from uploaded images. Just some additional gadgets need to set up to start/stop webcam and make continuos prediction from the frames of webcam.
In order to obtain more reliable prediction from webcam, I used moving average to smoothen the predictions of frames within 3 seconds and stop the webcam after 5 seconds to output the final predictions.
For the complete implementation (including prediction from webcam), please check out my repo: TFjs-BMI-prediction on GitHub.
6. Live Demo
The developed live demo is available at here
7. Reference
[1] MobileNets: Efficient Convolutional Neural Networks for Mobile Vision Applications
(link)
[2] Tensorflow.js Official Site (link)
[3] Keras Applications Available Models (link)
Leave a comment